by Daniel Currell
Landscaping
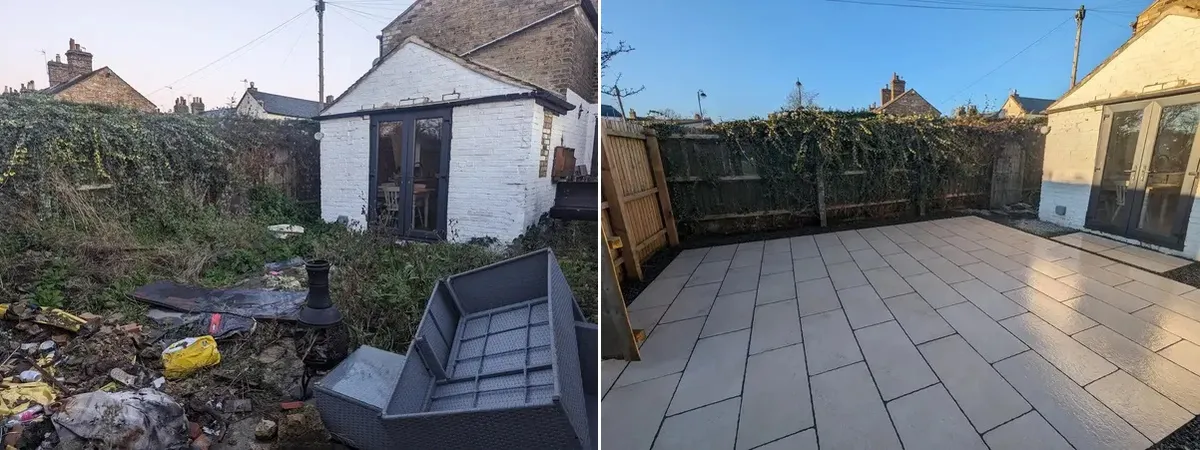
Case Study: Porcelain Patio Laid In Huntingdon
Quite often clients don’t see what goes into laying a patio as they may be at work themselves while we’re working so I thought I’d write up a job we completed, explaining step by step what’s involved. It’s not quite as simple as just laying a few slabs on the ground!
This particular job was a porcelain patio we installed for a lovely home in Huntingdon, Cambridgeshire. No two jobs are ever the same and there are always a few factors you have to work around, and in this case it was right next to a doctor’s surgery, so we wanted deliveries and the muck-away lorry to come on a Saturday, so as not to block or affect the surgery! I’m sure their priorities are higher than ours!
Clearing and Preparing the Ground
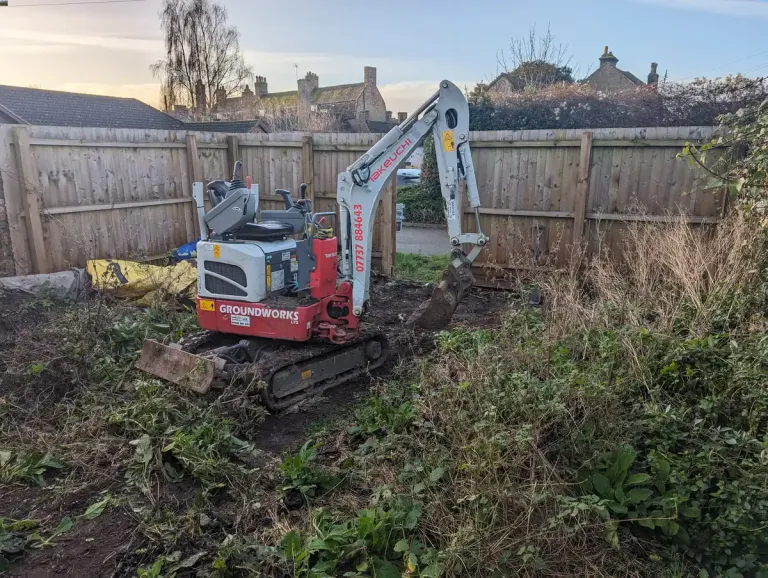
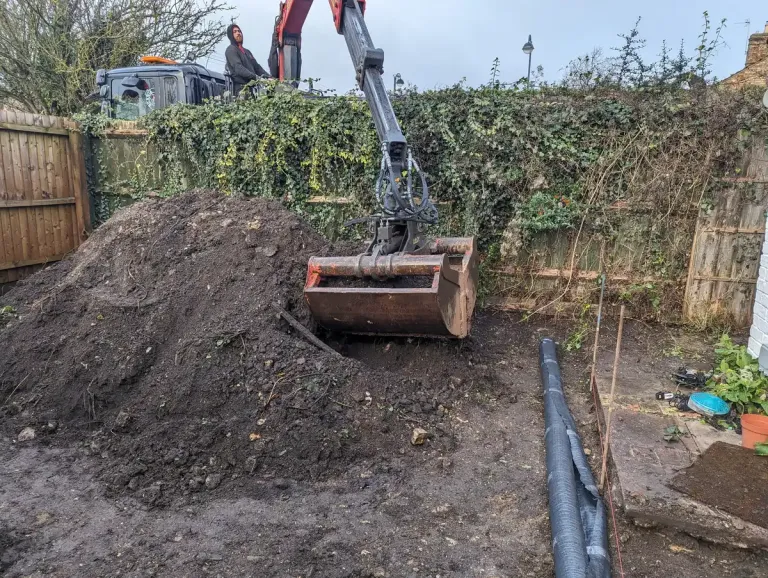
Firstly we had to have a bit of a clear up. Gardens often get neglected over the winter months especially with peoples busy work schedules! It didn’t take long to fill a trailer with excess hardcore such as house bricks, remove any litter that had been blown into the garden and remove an old slab path that nature had reclaimed. Once this was complete and the work area was clear, we removed the gate to allow the micro-digger in that GCE had kindly hired us. Now we were ready to prep and excavate the soil.
Getting the Sub-base to the Correct Level
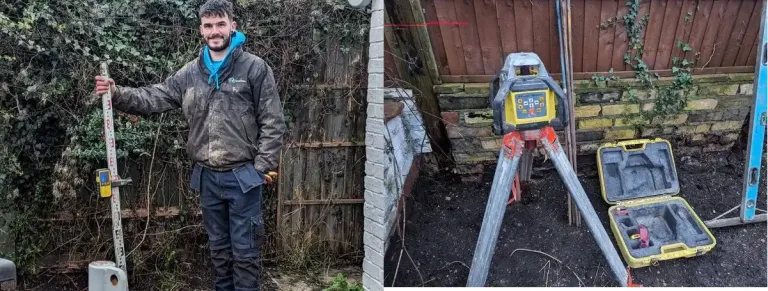
Next order of business was to work out what level we were going to have the patio at. There is an old concrete pad in this garden which was previously used for an outbuilding. Removing the concrete slab would mean extra time, fuel, materials etc, meaning more cost for the client, so as previously agreed we worked around the concrete slab. We can lay directly on to the slab as it’s hard-standing. Therefore we needed to make sure the rest of the area we were laying was 150mm below the top of the concrete slab. This would allow us to make our type 1 (aggregate we compact for base) bed on the soil, level with the concrete slab and upon completion of the patio, it would be all be level.
When excavating the soil we need to be able to check that each section is correct. To do this we use a laser level, an invaluable tool that has a small stationary unit which spins a laser and then a separate staff with a receiver that beeps when you’re at the correct height. Then we measured out where the patio would go and sprayed a line marking out where our patio was going to be laid.
Muck-away and Type 1 Delivery
The next factor we had to contend with was that due to it being close to a town centre and quite a built-up area, there wasn’t anywhere to put the tons of excess soil outside the garden for collection later. Therefore the muck-away lorry would have to reach over the fence and remove it from the garden. This meant we had to remove half the working area onto the other side of the garden and then move it back to allow us to dig out the other section.
We used the micro-digger because it was small enough to fit through the gate and more than capable of moving all the soil around while we checked the levels and made sure our sub-base was at the correct height.
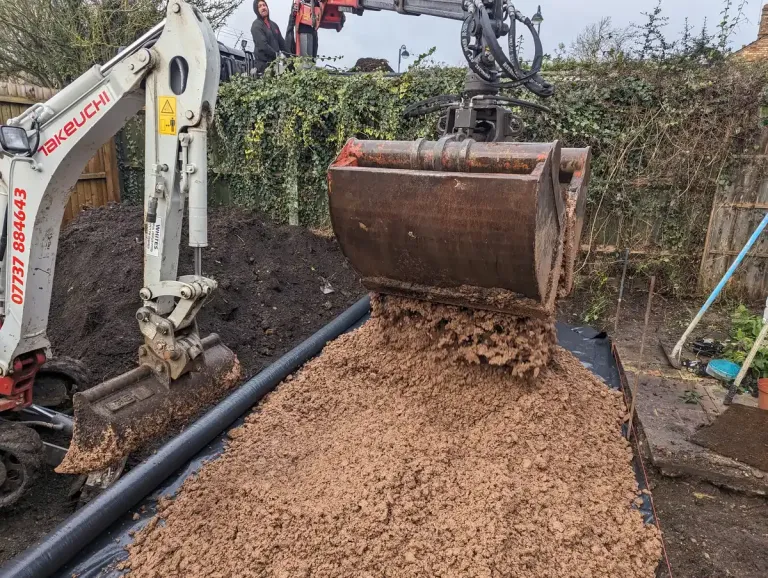
We had the excess soil removed at the same time as the MOT Type 1 was delivered using the same lorry to save on time and fuel.
We lay specialist weed-proof membrane between the soil and the hardcore, allowing water to drain and to prevent unwanted weeds growing through, helping the patio last much longer.
SGD Grab Services was kind enough to come out 9am on a Saturday, to avoid blocking access to the surgery during the week. The muck was swiftly removed and the Type 1 laid on the weed-proof membrane.
Preparing the Base for Laying the Patio
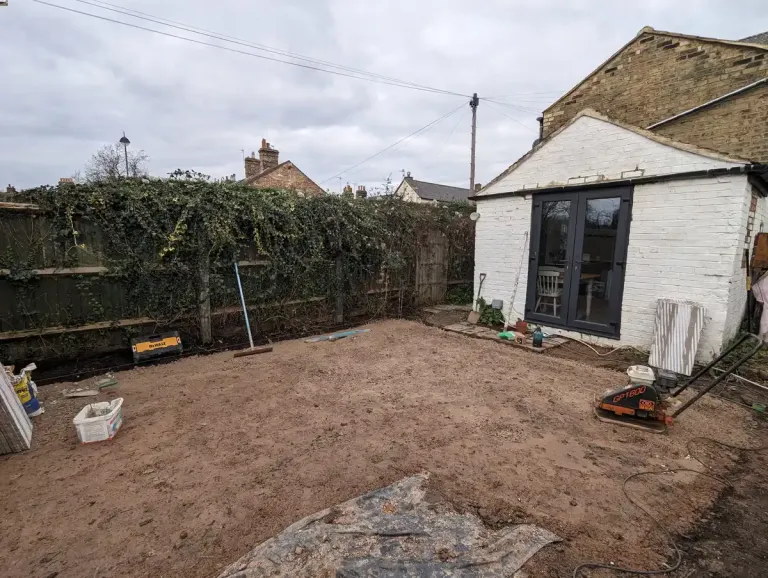
The rest of the day consisted of getting the weed-proof membrane laid out across our 30sq meter working area and cut down to size. Then moving the tons of Type 1 we had over the area, while checking with the laser level that we’d adjusted to slightly above the height of the concrete base in the garden, as this will be the top of the Type 1 level (once it’s compacted) and the bottom of the concrete that the patio will be installed on.
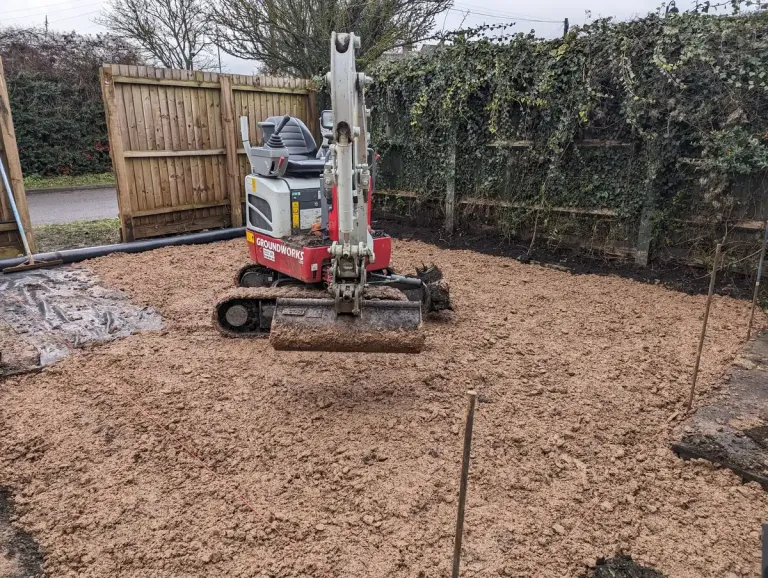
Getting the Type 1 ready is done by spreading the majority of it around with the micro digger and then raking it by hand while checking the level, before going over it for the first time with the whacker-plate. With our readjusted level to the height of the concrete base, we threw a bit more type 1 in any low spots using a shovel and then went over it again with the whacker-plate, till we were happy it was all at the right level and compact. Then the base was ready to begin laying on our next working day.
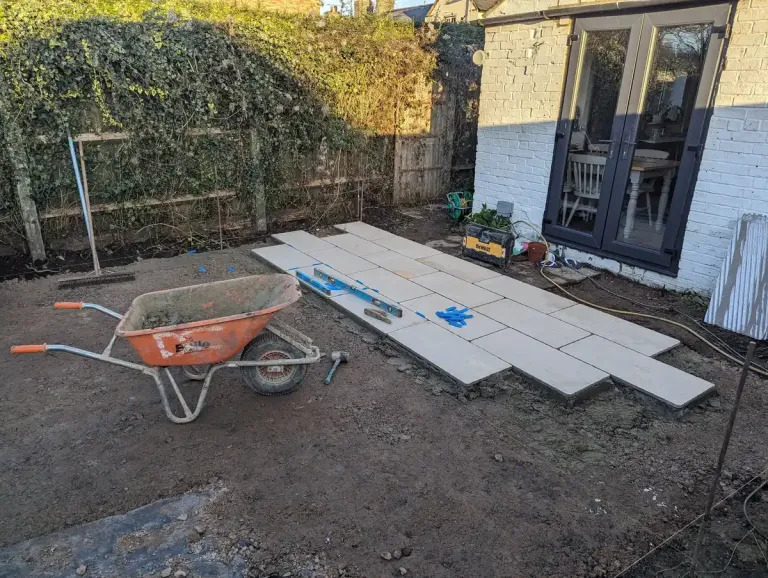
Installing the Porcelain Patio
We setup a string line parallel to the house, and another at a 90 degree angle using a set square that runs along the fence line. This makes sure that the patio is not at any strange angles later and as we lay we can see they’re all in line.
During this job we’d make several trips to our local builders merchant Rose Building Supplies for aggregate, decorative gravel, bags of cement and various other bits and pieces. They even gave us some free woolly hats as it’s cold out! After our first trip we had a ton of sand and a dozen bags of cement, which we’d mix with plasticiser to make it more workable and a bit more resistant to frost.
Due to porcelain being non-porous we have to coat the back of each slab with a special powdered adhesive making them stick firmly to their concrete base, this is a benefit of porcelain, because they’re firmly stuck in and are unlikely to come loose. Always having to be mindful while laying though, if you touch the adhesive with your gloves and then the top of the slab, it’s a bit of a struggle to remove.
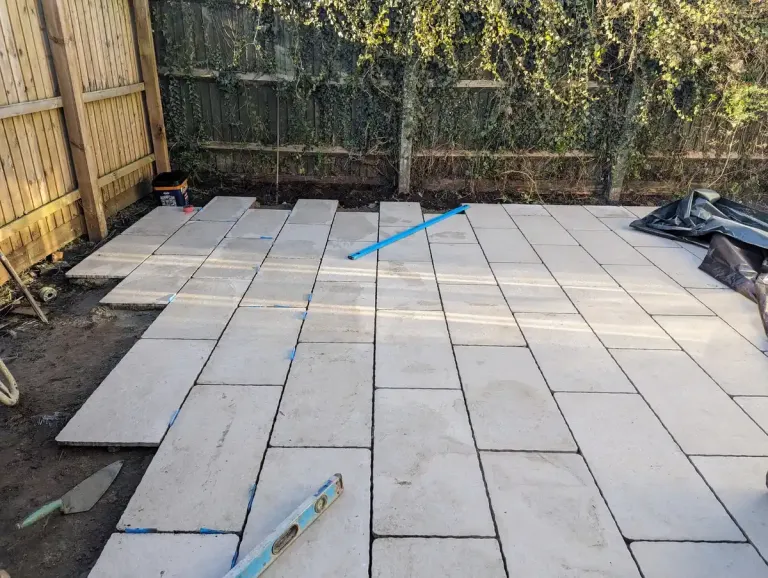
We laid along our string lines, checking with a spirit level, making sure each slab was very close to being perfectly level, but with a slight fall towards the end of the garden, to allow rainwater to run off in the coming years. Every other row of slabs was across by 50% to make the pattern, so each slab on these rows had to be marked with a pencil, top and bottom, to make sure they were in line and halfway across one another.
We laid the slabs for a couple of days inside our string lines and measurements, which left half a slab left at each end. We’d need to cut slabs in half to complete the patio. Using regular slabs, you’d cut with a petrol powered disc cutter in no time, however with porcelain they’re much more delicate, usually you’d use a tile-cutter but as we only had to cut about 14 slabs, so we opted for a hand-held angle grinder with a tile blade on it, takes slightly longer, but you save time on transporting and setting up a tile-cutter. It takes a while running the grinder up and down while applying a small amount of pressure not to chip the tiles. Due to the spacers we used laying the slabs, the cuts weren’t quite half (400mm) they were 395mm. Which meant the 800mm long slabs had to be cut twice to remove a 10mm section.
Decorative Gravel and Finishing Touches
The homeowner picked out some lovely decorative gravel and we used a few tonnes spread around the edges. When we prepped the patio, our measurements allowed for the extra space, so there was a solid type 1 base and weed-proof membrane to prevent weeds growing through the decorative gravel just like the patio itself.
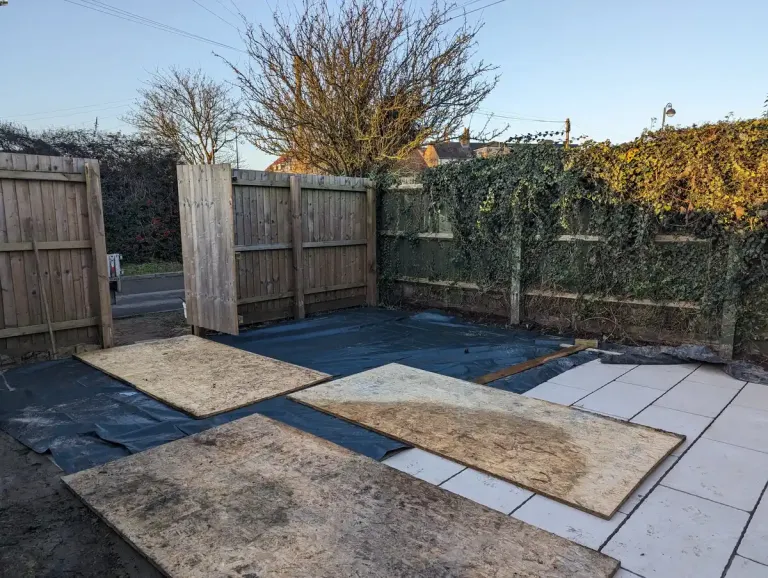
Because the patio had just been laid and not wanting to leave a mark or a scratch on the finished product, we laid some wooden boards on the patio to protect them while pouring out and evenly spreading the decorative gravel.
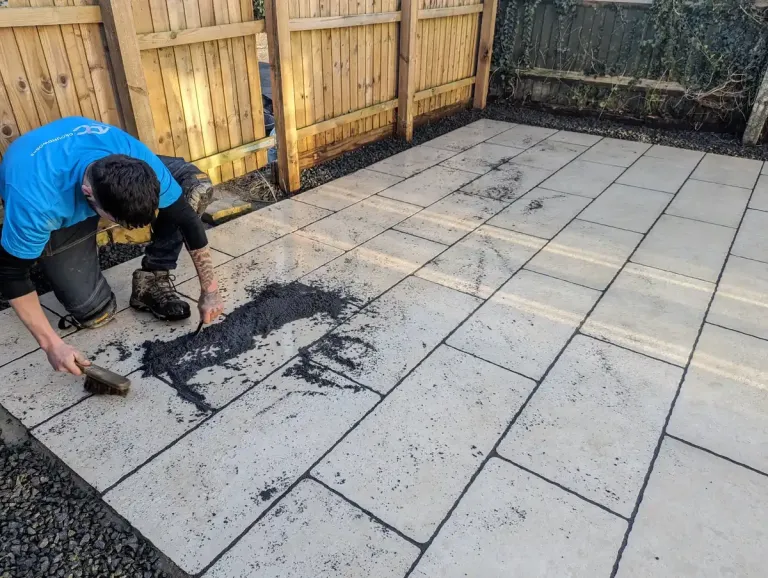
Once all the decorative gravel was around the edge and everything was as it should be we could begin the finishing touches. The grouting we brush into the space between the slabs is called EasyJoint. It’s so easy to use with multiple colours to choose from and it comes in 20Kg tubs. You pour it on the patio and soak it with a hose while brushing it in with a broom, before pressing it in by hand with a pointing iron. This aids the slabs staying in place for years to come. Due to it being difficult to get a grouting that exactly matches the slabs, unless you get them from the same company, most people usually go with a contrasting coloured grouting to the slabs to define the slabs and bring out the edges.
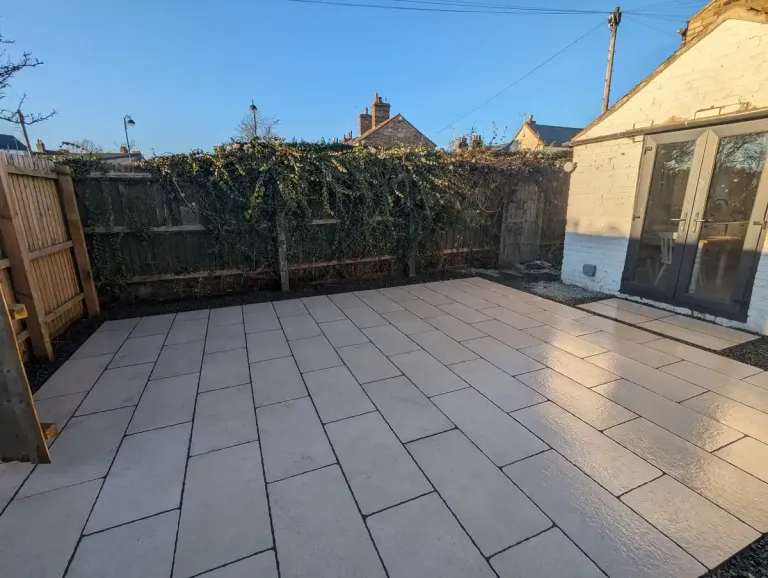
Patio Complete
Overall we were very happy with the completed job. Everything was as it should be and it looks great we think! It was a pleasure to work, we were spoiled by the homeowner with coffees, treats and food! Thankfully throughout the job the weather held out and didn’t stop us from working at any point!